1-800-540-9051
Info@HomesteadSupplier.com
7am-4pm Pacific Time Mon-Fri
1-800-540-9051
Info@HomesteadSupplier.com
7am-4pm Pacific Time Mon-Fri
1-800-540-9051
Info@HomesteadSupplier.com
7am-4pm Pacific Time Mon-Fri
1-800-540-9051
Info@HomesteadSupplier.com
7am-4pm Pacific Time Mon-Fri
From our experience, building a shed is not just a project, but a journey. And one of the most crucial steps in this journey is setting up the rafters.
If you've been scratching your head over this, you're in the right place. After putting it to the test countless times, we've got the perfect guide for you. So dive in, and let us teach you how to build rafters for a shed.
What this article covers:Making a shed is much like constructing a house; every layer matters. The walls of your shed are the pillars that will bear the weight of your roof, and by extension, the rafters. Before even thinking about the rafters, you must ensure that the walls are not just erected but are robust and resilient.
Start by inspecting the joints. Are they tightly secured? Do the corners meet seamlessly? These might seem like minute details, but they play a pivotal role in the overall stability of your shed.
The walls should be perpendicular to the ground with an even distribution of weight. If there's any wobbling or if the walls feel weak at certain points, it's crucial to address these issues immediately.
They should not only be set up but are also strong, straight, and built with precision. This foundational step will pave the way for a smoother rafter installation and a more durable shed overall.

Gable panels play a pivotal role in the overall structure and aesthetics of your shed. These triangular sections bridge the gap between the walls and the roof, providing both support and a pleasing visual transition. Their importance cannot be overstated.
First, familiarize yourself with the gable panels. Typically, they have a triangular shape, designed to fit the pitch of your shed's roof. Their design makes sure that rainwater, snow, and other elements slide off easily, preventing any potential damage or pooling.
If your kit includes four gable wall sections, it means you're working with a two-part gable panel system for each side of the shed. Begin by laying the two corresponding sections flat on the ground, face to face. Align them perfectly. Now, using 3-3” screws, join these sections together, forming a solid, unified panel.
Once you've assembled both gable panels, it's time to mount them. Position the gable panel so that its base sits on the top plates of your shed walls, with the edges flush to the outside. The design is intuitive; the notched ends of the gable panels are meant to interlock with the top plates, providing stability and precision in fit.
With the gable panel in place, secure it. Using 4-3” screws, fasten the panel firmly to the top of the walls. Make sure that the screws are evenly spaced and driven in straight, as this will provide the best support and reduce any chances of the panel coming loose over time.

For sheds that stretch 12 ft or more in length, it's essential to introduce a temporary collar tie.
What's a collar tie, you ask? It's a horizontal brace that's placed between opposing rafters, keeping them at a consistent angle and distance from each other. This tie provides added stability, especially when you're working with larger structures. Once you've secured the collar tie, you've set the stage for the roof panels.
Begin with one side of the shed. Position yourself so you have a clear view and access to the gable. With the help of a partner or using appropriate lifting equipment, lift the first roof panel. As you elevate it, angle it slightly to allow for a smooth slide into its designated position atop the gable. The panel should align correctly with the edges of the gable and sit flush.
Now, it's time to make it permanent. Using 3-3” screws, fasten the roof panel to the gable, making sure that it's tightly secured. It's essential to distribute the screws evenly across the panel's length, ensuring a firm grip and reducing the risk of any part of the panel lifting or warping over time.
With one panel in place, you'll move on to the next. The process remains the same: lift, slide, align, and secure. As you work through the installation, you'll find a rhythm, making the process more intuitive with each panel.
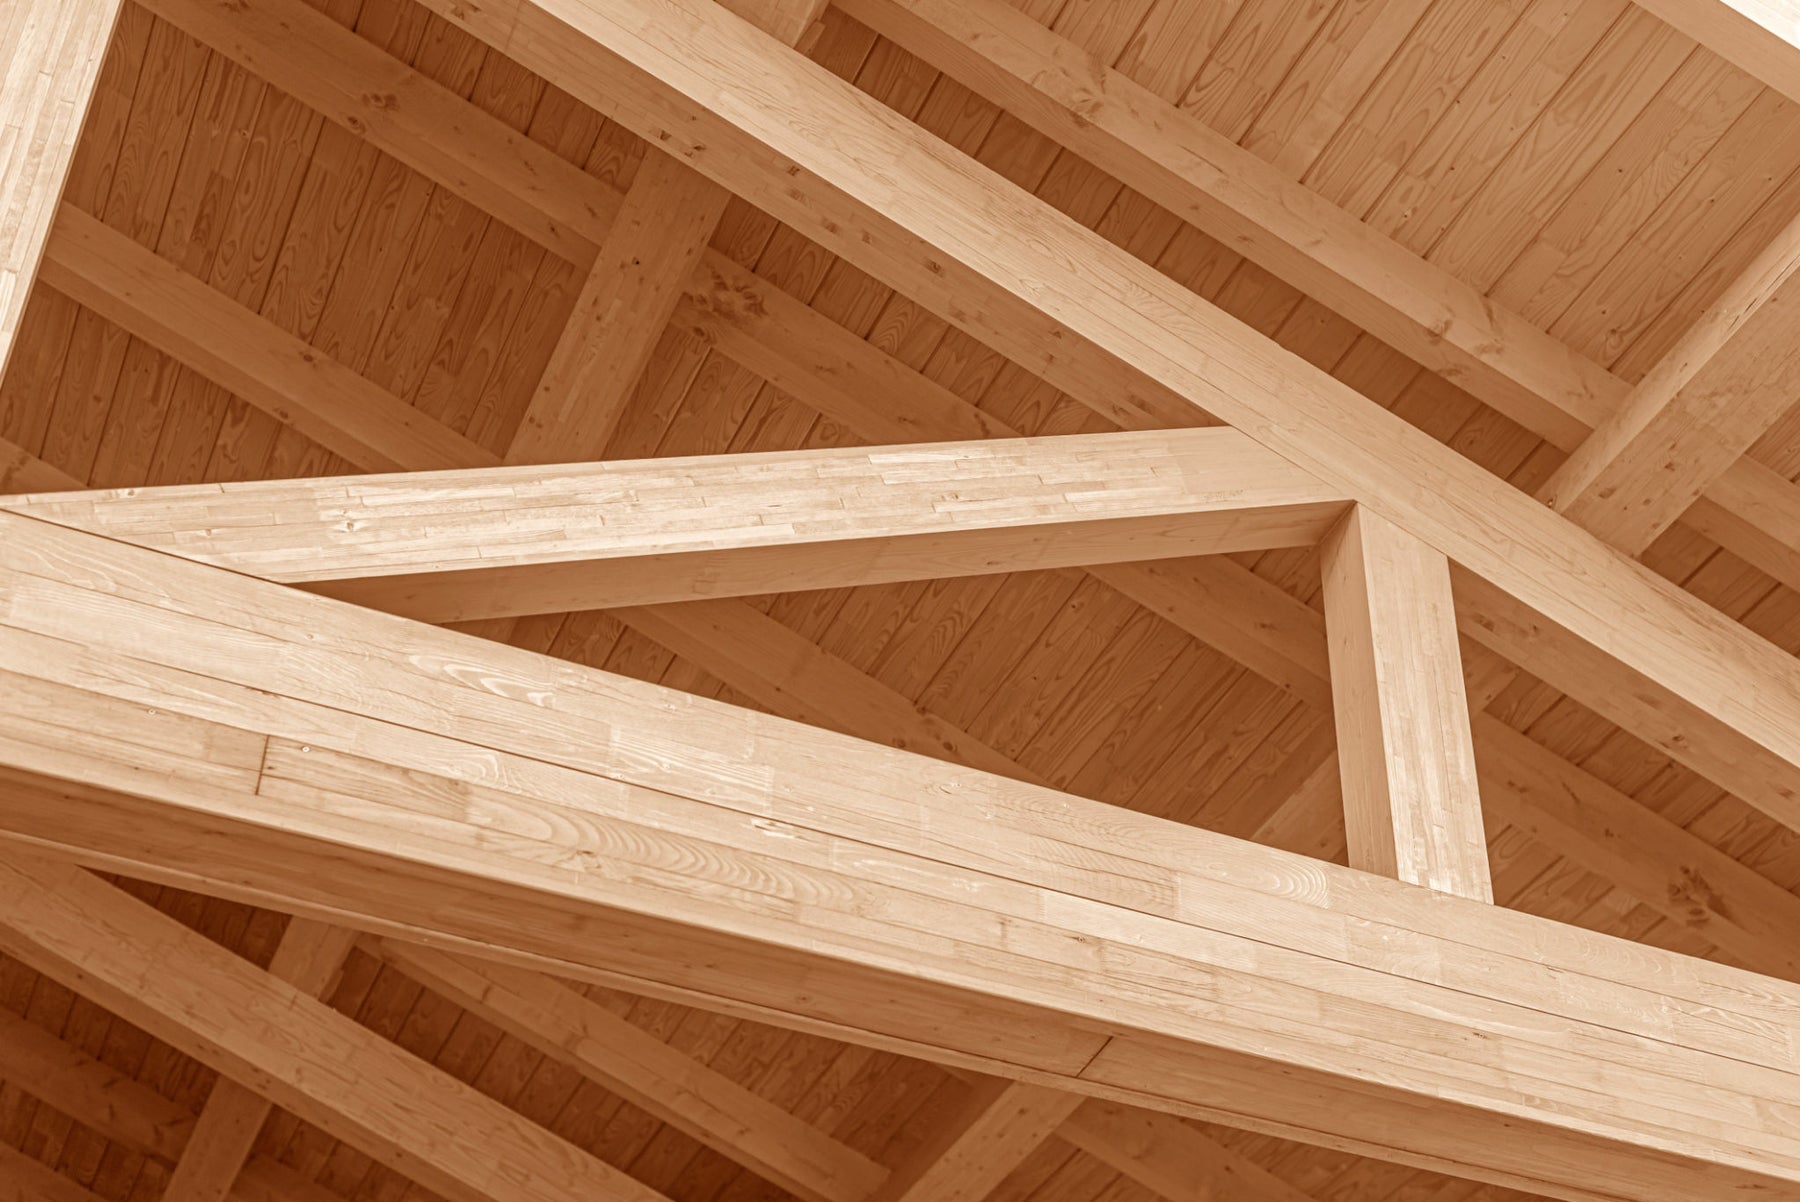
Gussets, while small in size, play a significant role in the structural integrity of your shed's roof. These flat, typically triangular pieces act as reinforcements. They keep the rafters firly connected and the roof panels in place.

Start by identifying the joints where the roof panels meet. These intersections are where the gussets will be installed. Their primary role is to bridge the gap between the panels, distributing weight and stress evenly across the roof structure.
Before attaching the gussets, align them correctly with the joints. The edges of the gussets should sit flush with the roof panels, creating a seamless fit. This alignment is crucial for both the structural integrity of the roof and the overall aesthetics of the shed.
Once you're satisfied with the positioning, it's time to secure the gussets. Using 4-3” screws, fasten the gussets directly to the face of the rafters. It's essential to drive the screws in straight and ensure they penetrate deep enough to hold the gusset firmly in place.
Distribute the screws evenly across the gusset, typically one at each corner and one in the center.
After you've installed all the gussets, take a moment to inspect your work. Make sure each gusset is firmly in place and that there are no gaps or misalignments. Proper installation will not only enhance the longevity of your shed but also ensure it can withstand external pressures, be it heavy snowfall or strong winds.
And there you have it, your rafters and roof are complete. With these steps complete, you can look at adding any extras to your shed, such as a DIY ramp for shed or a DIY shed loft.
Our kits are designed with you in mind. We've simplified the process, so that that even if you're a beginner, you'll find it easy to follow along.

Why reinvent the wheel when we've done the hard work for you? Our kits save you precious time, allowing you to focus on enjoying your shed sooner.
From our experience, the right materials make all the difference. Our kits come with top-notch materials that have been put to the test, ensuring your shed stands the test of time.
While building rafters for a shed roof might seem like an operation, with our kits they're easier than ever. You don't even need to worry about getting the measurements right, because everything is pre-cut for you. Simply install everything as we've outlined above, and you're good to go.
Our shed kits at Homestead Supplier are designed to make the shed-building process as smooth as possible, from start to finish. So, whether you're a seasoned builder or just starting out, we've got your back.
If you want to learn more, why not check out these articles below:
Compare products
{"one"=>"Select 2 or 3 items to compare", "other"=>"{{ count }} of 3 items selected"}
Leave a comment