1-800-540-905
Info@HomesteadSupplier.com
7am-4pm Pacific Time Mon-Fri
1-800-540-9051
Info@HomesteadSupplier.com
7am-4pm Pacific Time Mon-Fri
1-800-540-905
Info@HomesteadSupplier.com
7am-4pm Pacific Time Mon-Fri
1-800-540-9051
Info@HomesteadSupplier.com
7am-4pm Pacific Time Mon-Fri

Are you wondering how to build a heavy duty shed door that not only secures your belongings but also withstands the test of time? Well, you're in the right place! With years of experience under our belts, we've mastered the art of creating durable, reliable shed doors.
In this article, we'll cover everything from selecting the right materials and tools to the nitty-gritty of measuring, cutting, assembling, and installing your shed door.
We'll also delve into the crucial steps of adding bracing for stability, finishing touches for weatherproofing, and, of course, ensuring top-notch security for your shed.
So, grab your tools, and let's embark on this building adventure together.
What this article covers:Before we embark on this building adventure, let's gear up with the right tools and materials. From our experience, here's what you'll need to build a shed door:
First things first, let's measure the door opening. Accuracy is key here. Measure twice, cut once, as they say. Use a tape measure to get the height and width of the opening.

Don't forget to account for any necessary clearance for the door to open and close smoothly. Typically, you'll want to leave about a half-inch gap on all sides. This space is crucial for preventing the door from sticking during weather changes.
Now, let's cut the 2x4s to create the door frame. Remember, a square and stable frame is the backbone of your heavy-duty door. Use a square to ensure all corners are at right angles.
After putting it to the test, we recommend using wood glue and screws for a robust assembly. Lay out the 2x4s on a flat surface, apply wood glue at the joints, and then secure them with screws. This combination of glue and screws will provide a strong, long-lasting bond.
Next up, attaching the panels. Choose plywood or engineered siding for a durable finish. Make sure the panels are aligned and even for a professional look.
A little tip: lay the frame on the panel and trace it before cutting for a perfect fit. This ensures that the panel will match the frame perfectly. When attaching the panel to the frame, use screws for a secure fit, and make sure the panel is flush with the frame to avoid any unevenness.
Bracing is crucial for stability. Cut the braces at a 45-degree angle for maximum support. Secure them to the frame and panels firmly.
This step is vital for the door's longevity, so don't skimp on the quality of your braces or fasteners. The diagonal brace should run from the bottom of the hinge side to the top of the opposite side. This will prevent the door from sagging over time.
Before mounting, let's ensure that your door is weather-resistant. Sand it down for a smooth finish, then paint or stain it to your liking.

Finally, for how to seal shed doors, apply a weatherproofing sealant. This step is essential for protecting your door from the elements. Make sure to cover all surfaces, edges, and corners.
A good sealant will not only protect the wood from moisture but also from UV rays and temperature changes. You can also add weatherstripping for additional protection against weather and rain.
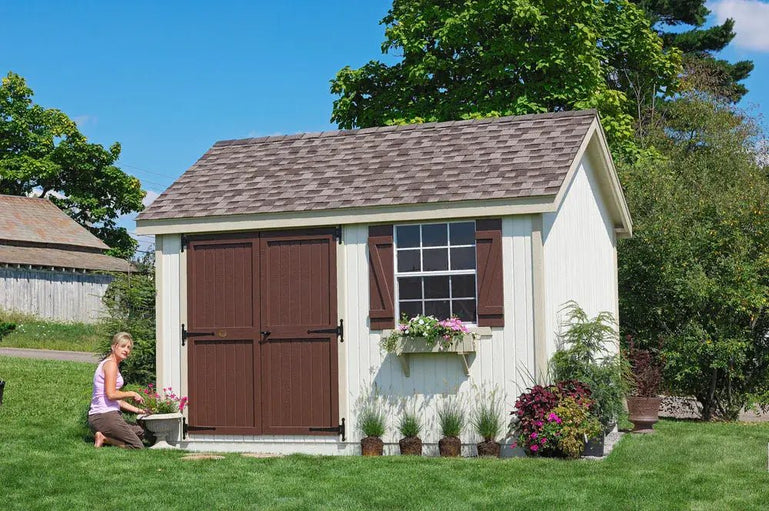
When mounting your heavy-duty shed door, shed door hinge placement is crucial for smooth operation and durability.
Opt for strong T-hinges or strap hinges, using two for standard doors and three for doors over 6 feet to prevent sagging. Install the top hinge about 7 inches from the top, the bottom hinge 11 inches from the bottom, and any middle hinge evenly spaced.
Ensure horizontal alignment with a spirit level for a straight hang. Mark and pre-drill hinge placements for accuracy, attach hinges to the door first, then to the frame, maintaining a consistent gap for easy operation. Test and adjust as necessary, as proper hinge installation ensures both functionality and security.
A sturdy lock and heavy-duty bolts will keep your belongings safe. According to our research, a combination of a padlock and a deadbolt offers excellent shed door security.

Install the lock and bolt at a convenient height, and make sure they are easy to operate but provide a strong level of security. For added protection, consider installing a strike plate where the lock and bolt meet the frame.
And there you have it, a heavy-duty shed door that's not just functional but also a testament to your craftsmanship. Remember, an exceptional shed starts with a solid door, and with these steps, you're well on your way to achieving that.
If you're looking for a shed kit to match your new door, look no further than Homestead Supplier. Whether you're looking for an 8x10 shed or a 12x16 shed kit, we've got everything you need to make your shed-building dreams become a reality.
If you want to learn more, why not check out these articles below:
Compare products
{"one"=>"Select 2 or 3 items to compare", "other"=>"{{ count }} of 3 items selected"}
Leave a comment