1-800-540-905
Info@HomesteadSupplier.com
7am-4pm Pacific Time Mon-Fri
1-800-540-9051
Info@HomesteadSupplier.com
7am-4pm Pacific Time Mon-Fri
1-800-540-905
Info@HomesteadSupplier.com
7am-4pm Pacific Time Mon-Fri
1-800-540-9051
Info@HomesteadSupplier.com
7am-4pm Pacific Time Mon-Fri

Anchoring a shed to pavers might sound daunting, but it's a practical solution to ensure stability and security. At Homestead Supplier, we've researched and tested various methods, and we're here to share our expertise on how to anchor a shed to pavers for maximum shed security.
This guide covers everything from choosing the right pavers and preparing the ground to laying a solid base and securing the shed. With our step-by-step instructions, anyone can confidently tackle this project, ensuring their shed remains stable for years to come.
Whether you're a seasoned DIY enthusiast or new to shed installation, our detailed approach will make the process straightforward and successful.
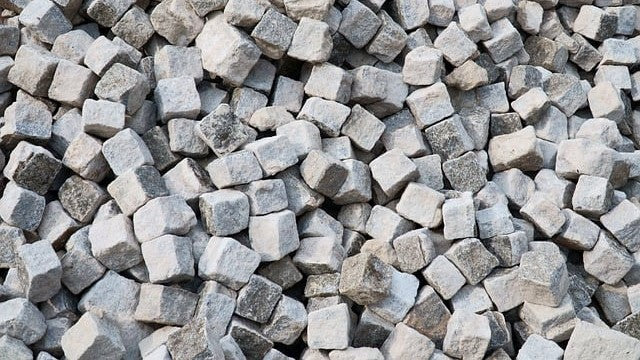
Selecting the right pavers is crucial for a stable shed foundation. According to our research, pavers come in various materials, including concrete, brick, and natural stone. Anchoring shed to concrete is a popular choice because it's durable and cost-effective.
They can withstand heavy loads without cracking. Brick pavers offer a classic look and are also quite strong, but they can be more expensive. Natural stone pavers add an elegant touch but come at a higher cost.
The thickness of the pavers is just as important as the material. Pavers need to be thick enough to support the weight of the shed and any contents inside it. Typically, pavers that are 2-3 inches thick are recommended for heavy structures. This thickness ensures they won't shift or crack under the load.
Preparing the ground properly is essential for a solid foundation. Start by removing any grass, rocks, or debris from the location where the shed will sit.
Use a shovel to dig out the area to a depth of 4-6 inches. This creates a space for the base material and pavers.
After clearing the area, ensure the ground is level. This step is crucial for the stability of the shed. Use a level and a landscaping rake to even out the surface. A flat, level surface helps prevent future shifting.
We would also recommend ensuring that you have the correct building permits according to your local building codes and zoning laws before beginning work on your shed. Having the legalities ironed out beforehand will save you hassle in the long run.
Creating a solid base is the next step in ensuring your shed remains stable. From our experience, a base of gravel or sand works well. If you would prefer to anchor directly into the gravel, be sure to check out our guide on how to anchor a shed into gravel.
Spread a 2-3 inch layer evenly across the prepared area. Gravel is excellent for drainage, while sand provides a smooth surface.

Use a compactor to press down the base material. This compaction helps to prevent the base from shifting or settling over time. A well-compacted base supports the pavers and, ultimately, the shed.
With the base prepared, it's time to lay the pavers. Start placing the pavers from one corner of the area, working your way out. Ensure each paver is level and fits snugly against its neighbors. This tight fit helps maintain stability.
Use a rubber mallet to gently tap the pavers into place. This ensures they are firmly set in the base material. A tight fit between pavers prevents movement and shifting.
Anchoring the shed to the pavers ensures it remains secure. Position the shed on the pavers and mark where you will drill the anchor points. Typically, these points are at the corners and along the sides for larger sheds. Precise marking is essential for proper alignment.
Use a hammer drill to make holes at the marked points. Ensure the holes are deep enough to accommodate the anchor bolts. Drilling through the pavers and into the base material creates a strong anchor point.
Insert the anchor bolts through the shed's base into the drilled holes. If needed, use epoxy to secure the anchors further.
Tighten the bolts to secure the shed firmly to the pavers. After putting it to the test, we've found that this step ensures the shed won't move during high winds or heavy use.
After anchoring, some final adjustments ensure everything is perfect. Once the shed is anchored, check for any wobbling or instability. Make any necessary adjustments to the anchors or pavers to ensure everything is secure.

Fill any gaps between the pavers and the shed's base with sand or gravel. This not only enhances stability but also improves the appearance. Filling gaps helps prevent weed growth and water accumulation.
Anchoring a shed to pavers is a straightforward process that ensures long-term stability and security. By choosing the right pavers, preparing the ground properly, laying a solid base, and securely anchoring the shed, you can create a durable and attractive foundation.
Remember to check for stability and fill any gaps for a polished finish. With our step-by-step guide, you can confidently tackle this project and protect your investment. For high-quality shed kits and expert advice, visit Homestead Supplier today!
If you want to learn more, why not check out these articles below:
Compare products
{"one"=>"Select 2 or 3 items to compare", "other"=>"{{ count }} of 3 items selected"}
Comments
Leave a comment